IAM Users
Setup IAM Users for Blitline
AWS IAM PERMISSIONS
Blitline offers the ability to simply give us IAM credentials and we will upload the images to your bucket as you.
In the past, and for simplicity’s sake, we had users give Blitline permission to their buckets, and Blitline would then be allowed to upload files into the buckets. This had it’s advantages and disadvantages. The advantage was that you never had to give Blitline credentials (which, as with any 3rd party) are a security liability. You controlled any and all permissions that Blitline had from your side, not proxied through us. The down side to this, was that Blitline was registered as the ‘owner’ of the files (although with the Canonical ID, we set the clients to have ‘full-control’ over the S3 images). In S3 terms, ‘owner’ is more of a symbolic option, like ‘queen of England’ because as owner YOU have full control over the objects in the bucket, and can deny Blitline access to those objects at any time.
Now, due to popular demand, Blitline offers the ability to simply give us IAM credentials and we will upload the images AS you (via your IAM user). Effectively what we are doing is generating an upload URL on our end (which is the same as the ‘signed urls’ option), except we (Blitline) are doing it for you.
CREATE AN IAM USER
To use the IAM feature on Blitline, you must first create an IAM user that has limited permissions. Specifically you want one that probably only has permission to write to your bucket (and set ACLs), since this is all the Blitline needs.
From you AWS console, select “Services/IAM/Users”
- Create Blitline User
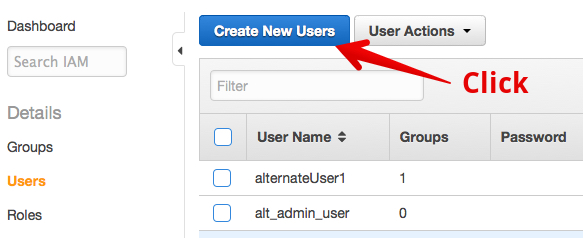
- Then name your user, we suggest something like “blitline_s3_user”

Click "Create"...
Write Down Keys!
After creating your new user, it is IMPORTANT that you MUST write down the “Access Key ID” (Key) and “Secret Access Key” (Secret). This “Key” and “Secret” will be what you need to enter on Blitline.com. You will not have access to your “Secret” at any other time on AWS besides this screen.
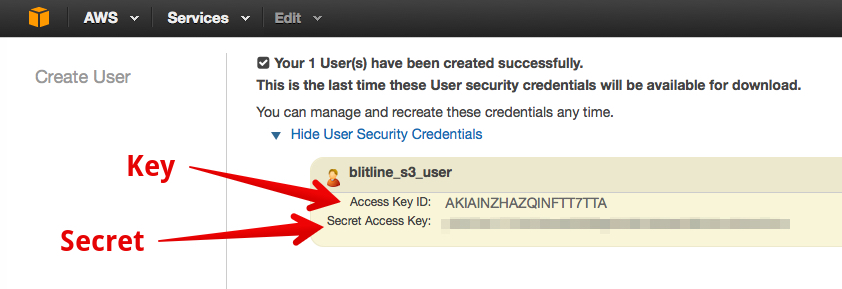
Click Close
- Select the user from the list of users
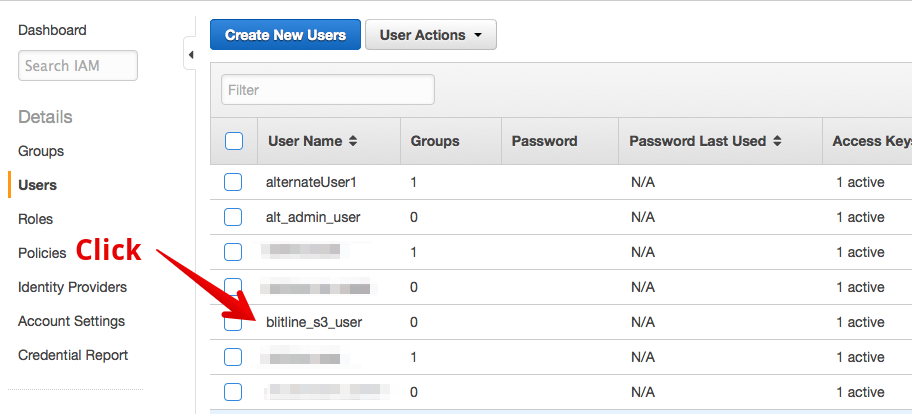
- Create new Inline Policy
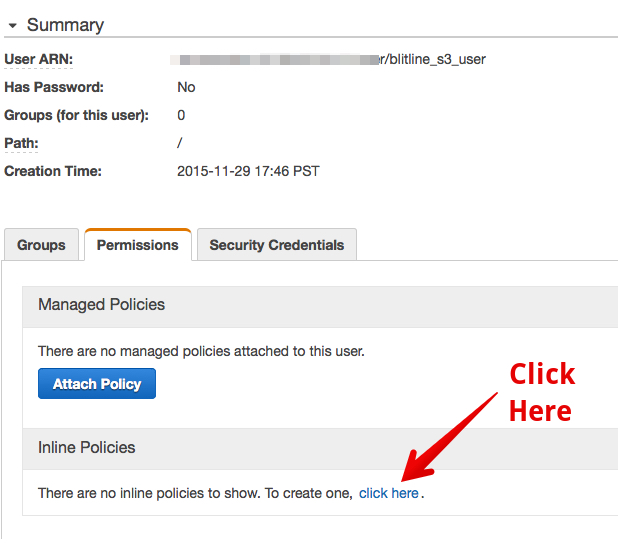
5 . Select custom policy

Insert the following JSON into the policy box. IMPORTANT! You must change “YOUR_BUCKET_NAME!!” to match your actual bucket name that you want Blitline to write images into.
{
    "Version": "2012-10-17",
    "Statement": [
        {
            "Effect": "Allow",
            "Action": [
                "s3:GetObject",
                "s3:GetObjectAcl",
                "s3:PutObject",
                "s3:PutObjectAcl"
            ],
            "Resource": [
                "arn:aws:s3:::YOUR_BUCKET_NAME!!/*"
            ]
        },
        {
            "Effect": "Allow",
            "Action": [
                "s3:GetBucketLocation"
            ],
            "Resource": [
                "arn:aws:s3:::YOUR_BUCKET_NAME!!"
            ]
        }
    ]
}
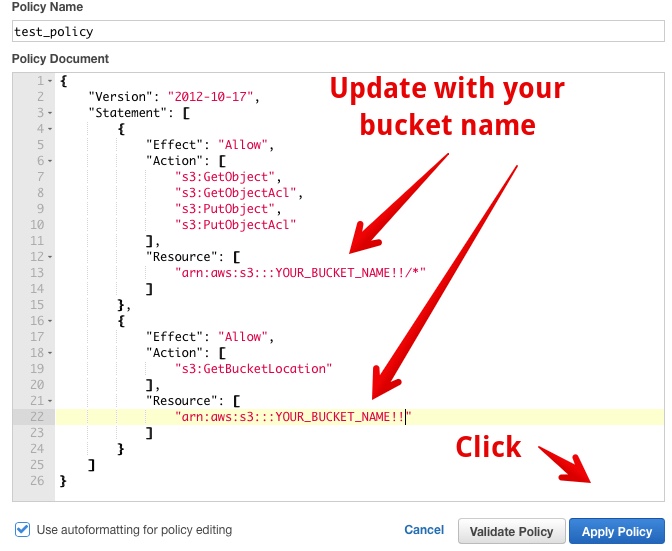
Click Apply Policy
You have now created a new user with an IAM policy that has access to your S3 bucket. Now go to Blitline.com, log in, and enter the Key and Secret you wrote down above.
Updated over 3 years ago